Quantcast
Channel: Kruemels Bastel-Blog
Viewing all 2698 articles
Browse latest View live

Stempeleinmaleins - Ausgabe vom 7. Oktober 2017

$
0
0

Hallo Ihr Lieben!
Heute zeigen wir Euch beim Stempeleinmaleins eine"Verpackung für Minzbonbons" - man darf ja heutzutage gar nichts mehr sagen oder zeigen... Die Anleitung enthält sowohl die Maße für normale, als auch die Mini-IhrWisstSchonWas.

Hello everyone!
Over at Stempeleinmaleins we are sharing a tutorial for a mint gift today. The tutorial give measurements to make a box for both the regular as well as the mini mints.


Meine Verpackung für die normal-großen Mints ist schon mal halloween-ig dekoriert. Denn dafür bietet sich diese Verpackung ja an. 
Auf der Vorderseite habe ich die beiden Kürbisse und den Geist von Magnolia aufgebracht. Dahinter befinden sich ein paar Wolkenschleier, Cheesecloth, ein Grabstein und zwischen den Kürbissen noch etwas Gras. Auch eine kleine Schleife durfte nicht fehlen.

My box for the regular sized mints is decorated as a Halloween gift. This is something those boxes really seem to be perfect for.
To the front I've added those two pumpkins ans the ghost by Magnolia. Behind those there are a few clouds, a gravestone and some cheesecloth. There's also some grass between the pumpkins and I also added some twine here.


Den inneren Teil habe ich mit "Trick or Treat" bestempelt und weiß embosst. Dass das Embossingpulver hier etwas am Cardstock kleben blieb, finde ich toll, denn das passt zu Halloween, finde ich.
Oben habe ich noch ein Happy Halloween, ebenfalls embosst, auf ein Banner gestempelt und aufgeklebt.

The inner part was decorated with a Trick or Treat saying that is heat embossed using white embossing powder. That there were a few smaller pieces sticking to the cardstock here is something I really like because it goes great with Halloween.
For the top I've stamped - and also heat embossed - a Happy Halloween onto a banner and glued to the inner part.

Und hier habe ich noch meine Version für die Mini-Mints. Das waren die Swaps, die ich dieses Jahr fürs Mekka vorbereitet hatte. Die Mini World Schnecke von Magnolia war geradezu perfekt - es ist hier wirklich nicht viel Platz für Deko. Aber bisschen was geht immer, oder?

And  here is my version of the mini mints box. Actually these are the swaps I made for a stamp fair that was held in September. That cute Mini World snail by Magnolia seemed perfect - there's really not much room for decorations here. But there's always room for some, right?


Es gibt Tee bei Noor!Design UK

$
0
0

Hallo Ihr Lieben!
Heute zeige ich eine weitere Karte auf dem Noor!Design UK Blog. Sie ist blau - und nein, ich meine nicht das Mädchen auf der Karte sondern natürlich die Karte selbst!

Hello eveyone!
Today I am sharing another card over at the Noor!Design UK Blog. It's blue with a hint of light brown and white. Did I mention I am not a colorful person? ;)

Ich habe Designpapiere in verschiedenen Blautönen zugeschnitten und mit braunem Cardstock gemattet. Das bringt etwas Kontrast. Auf die unterste Lage habe ich etwas Spitze gesetzt. 

I used designer's papers in different shades of blue and matted them using light brown cardstock to add some contrast. On the biggest piece of paper I've added some white lace.


Das Motiv finde ich echt knuffig - aber ich habe mich damit irgendwie schwer getan. Zwei Abdrücke wanderten in den Müll, nachdem ich angefangen hatte, sie zu colorieren. Bis mir dann die Idee kam, das Motiv mit weißem Pulver auf braunen Cardstock zu embossen und nur das Mädchen ein wenig mit Farbe zu füllen. Außerdem habe ich ein paar kleine Details wie die Herzen und die Kirsche auf dem Muffin ganz leicht eingefärbt.
Das Motiv habe ich weiß hinterlegt und dafür die Bordürenstanze verwendet.

I think this is a really cute image - but somehow I had a hard time with it. Two stamped images went into trash after I've started coloring them in. And then I had the idea of heat embossing it with white powder onto light brown cardstock and just color in the girl a bit. I also colored in a few smaller details like the hearts and the cherry on the cupcake.
I've put some white cardstock underneath the image and used a border die here.


Nachdem der Rest ja eher schlicht ist, durfte die Deko etwas stärker ausfallen. Die schöne weiße Blüte ist von einem Stück Spitze abgeschnitten, die langen Bänder darunter habe ich drangelassen. Dazu kamen zwei Pixie Bloosoms, ein Metall-Blatt und der süße Teekannen-Charm, den ich mit etwas Twine angebunden habe.

Since the rest of my card is kind of simple I added a few more decorations. The beautiful white flower is cut from a piece of lace, the longer pieces of that lace is what you can see under the flower. I also added two Pixie Blossoms, a metal leave and that cute tea pot charm that I tied to my card with a piece of twine.


Und damit nicht nur die untere Ecke dekoriert ist, habe ich oben am Motiv noch etwas mehr angebracht. Ich habe das Metall-Herz auff die Karte geklebt und daran diese süße herzförmige Flasche angebunden, die ich blauem Glitter gefüllt habe.

Since all the decorations were put in one corner I decided I need more on the other side. So I glued the metall heart onto my card and tied that cute heart shaped bottle to it - after filling it with some blue glitter.

Ich habe auch noch einen Bonus für Euch - mit dem Code BecauseIKnowKathrin bekommt Ihr auf jede Bestellung im Shop 10 % Rabatt.

And I also have a bonus for you - use the code BecauseIKnowKathrin during check out in the shop and you'll get 10 % off your entire order.


https://www.crafteezee.co.uk/ourshop/prod_6168640-0930Blue-Flower-Border-Die.htmlhttps://www.crafteezee.co.uk/ourshop/prod_6118824-The-Peony-Avenue-12x12-Paper-Pack.htmlhttps://www.crafteezee.co.uk/ourshop/prod_6047078-Minature-Glass-HEART-SHAPED-Wish-Bottle-with-Cork.htmlhttps://www.crafteezee.co.uk/ourshop/prod_6048962-Antique-Bronze-Floral-Heart.htmlhttps://www.crafteezee.co.uk/ourshop/prod_5530030-Metal-Leaves-pk-10.htmlhttps://www.crafteezee.co.uk/ourshop/prod_5171647-Lace-Gwendoline.htmlhttps://www.crafteezee.co.uk/ourshop/prod_6030211-Lace-Irene.htmlhttps://www.crafteezee.co.uk/ourshop/prod_6063938-Pixie-Blooms-ANTIQUE-BLUE.htmlhttps://www.crafteezee.co.uk/ourshop/prod_6131609-LDRS-PD-A-Teacup-Full-of-Wishes.html

Eine Halloween-Lollipop-Card für AltairArt

$
0
0

Hallo Ihr Lieben!
Heute darf ich wieder auf dem Blog von AltairArt posten. Und da es dort mein einziger Post für Oktober ist, wollte ich unbedingt auch dort ein Halloween-Projekt zeigen. Und so ist diese Lollipop Card in Halloweenoptik entstanden.

Hello everyone!
Today I am sharing another creation over at the AltairArt Blog. And since it's my only DT post over at the blog I really wanted to make a halloween project. So I made this lollipop card.


Hinten habe ich eine Papier-Rosette verwendet, die ich aus dem Sunrise 06 Papierbogen gemacht habe. Lila geht zu Halloween ja immer und ich finde es schön, dass es eben nicht so dunkel ist. 
Auf die Rosette kam ein Kreis aus schwarzem Cardstock, darauf dann ein weiterer Kreis, den ich aus einem der Papiere aus dem Signs of Love Papierblock ausgestanzt habe. Er hat ein ganz leichtes Muster und ist mit einem leichten Farbverlauf. So heben sich die Kürbisse im Vordergrund prima davon ab. 
Dekoriert habe ich mit ein paar ausgestanzten Zweigen, Wolken, einem Text - mit dem Dymo geschrieben - der süßen Fledermaus und den beiden Kürbissen von Magnolia.
Unten an den Papier-Strohhalm, den ich in die Rosette geklebt habe, habe ich noch etwas schwarze Spitze, lilafarbenes Band und orange-schwarz gestreiftes Garn angebunden.

I started with a paper rosette that I've made from the Sunrise 06 paper sheet. Purple is always a good choice for Halloween projects and I love that this isn't such a dark purple. 
Onto the rosette I've glued a circle from black cardstock, then put another circle on it that was cut from one of the papers of the Signs of Love paperpack. It has a soft pattern and the color is chaning from dark to light. With this, the pumpkins I used as an image really pop out.
I decorated my card with a few die cut twigs, clouds, a saying - printed with my Dymo - the cute bat and those two pumpkins by Magnolia.
To the paper straw that I've put into the rosette I've tied some black lace, purple ribbon and some orane and black twine.


https://www.skarbnicapomyslow.pl/pl/p/AltairArt-Signs-of-love-bloczek-15x15-cm-/8319https://www.skarbnicapomyslow.pl/pl/p/AltairArt-Sunrise-06-fioletowy/6531

Eine Überraschungsbox für Stamping-Fairies

$
0
0

Hallo Ihr Lieben!
Heute zeige ich auf dem Stamping-Fairies Blog eine weitere Halloween-Kreation. Ich muss die Zeit doch ausnutzen, in der ich das kann! Ist ja nicht wie Weihnachten, dass man das ewig für vorarbeiten bzw. im Voraus zeigen kann...

Hello everyone!
Today I am sharing another Halloween creation over at the Stamping-Fairies blog. I really have to use the time that I can. I mean, it's not like those christmas cards that you can share all year long...

Wie schon in der Überschrift geschrieben, ist das eine Überraschungsbox. Erstmal eher unspektakulär eine rechteckige Box. Ich habe dafür schwarzen Cardstock verwendet. 

This is a surprise box. It doesn't look so surprising at first sight, just like a rectangle box cut from black cardstock.


Für die Vorderseite habe ich den Make Your Mark Background mit Distress Ink Blueprint Sketch auf blauen Cardstock gestempelt. Darauf kam ein Rechteck aus gelbem Cardstock, auf den ich mit Distress Ink Fossilized Amber und der Radiating Rays Schablone ein Muster aufgebracht habe.
Der süße Frankenstein ist wieder aus dem Fa-Boo-Lous Friends Stempelset und sitzt hier im kleineren der Peek-a-Boo Wonky Windows. Wie schon gesagt, die finde ich für Halloween klasse!
Unten habe ich dann noch ein Boo, gemacht mit den Stitched Banner Alphabet Stanzen aufgeklebt, oben fliegt eine Fledermaus aus dem Spooky House Stanzenset.

For the front I stamped the Make your Mark Background onto blue cardstock using Distress Ink Blueprint Sketch. Then I added a rectangle from yellow cardstock here, that I added a pattern to using Distress Ink Fossilized Amber and the Radiating Rays stencil
The cute Frankenstein is again from the Fa-Boo-Lous Friends stamp set and is sitting in the smaller of the Peek-a-Boo Wonky Window dies. As I said before, I love those for Halloween!
Then I added a Boo, cut using the Stitched Banner Alphabet dies, and the bat from the Spooky House die set is flying across the top.

Am Band oben kann man dann die eigentliche Box herausziehen - die erste war nur eine Umverpackung.

Pulling the ribbon you can take out the real box - the other one is just wrapped around it.


Wenn Euch jetzt angesichts des Chaos in der Box einige Fragezeichen um den Kopf schwirren - ich löse das gleich auf! Denn so ist das ganze natürlich nicht gedacht.

If you have a few question marks flying around your head now because of the mess inside the box - don't worry, this is not what it is meant to be and I'll show you:


Man kann an den beiden Bändern seitlich ziehen und die Seitenteile so aufklappen, so dass eine Szene entsteht.

You can pull the ribbons on the sides and open the sides up so you get a little scene.


Die Box ist relativ tief, so dass man wirklich Platz für die Szene hat. 
Hier habe ich im Hintergrund dunkelblauen Cardstock verwendet, auf den ich das Spukhaus aus dem Spooky House Stanzenset aufgeklebt habe. Eines der Fenster ist erleuchtet, aber das kann man auf den Bildern nur sehen, wenn man es weiß. ;) Der Mond und der Baum sind übrigens aus dem selben Stanzenset. Die kleinen Wolken sind aus dem Beach Scene Builder Set.
Es befinden sich zwei weitere Lagen innerhalb der Box. Hier habe ich einen Geist, der hinter dem Baum hervorschaut, und einen Grabstein, sowie hinter die vorderste Lage die kleine Hexe aufgeklebt.

The box is quite deep so there's a lot of room for a scene.
Here I used some black cardstock in the background that I glued the house from the Spooky House die set onto. One of the windows is lit up but on the photo you can only see it when you know it. The moon are tree are from the same stamp set, the small clouds from the Beach Scene Builder die set.
There are two layers inside the box. Here I used the ghost, who is peeking from behind the tree, and a gravestone and on the front level the little witch.


Auch die ausklappenden Seitenteile sind dekoriert. Man muss beim Aufkleben nur darauf achten, dass die verschiedenen Lagen auf verschiedenen Höhen sitzen, so dass sie beim Schließen der Box aneinander vorbei gleiten können.
Hier habe ich jeweils Büsche, einfach gemacht mit den Cloud Stax Dies, aufgeklebt. Darüber befindet sich eine Bordüre mit Text. Dafür habe ich wieder die Stitched Banner Alphabet Dies verwendet. Und links schaut ein kleiner Vampir zwischen den Büschen hervor.

Also the sides that can be opened are part of the scene. When glueing the layers down you just have to make sure that they can slide behind each other when the box gets closed.
Here I added some bushes, simply made using the Cloud Stax dies, and a banner with a saying. I used the Stitched Banner Alphabet dies here again. And on the left side, a little vampire is peeking from behind the bush.


Auf der rechten Klappe geht der Text dann weiter. Die Seite ist identisch wie die linke dekoriert, nur seitenverkehrt. Und hier habe ich statt des Vampirs eine Mumie mit aufgeklebt.

The saying is going on on the right flap. This side is made identically like the other one, just mirrored. And instead of the vampire I added a mummy here.


https://www.stamping-fairies.de/werkzeuge-nuetzliches/die-namics/-17731.htmlhttps://www.stamping-fairies.de/werkzeuge-nuetzliches/schablonen-stencils/mft-stencils/-18841.htmlhttps://www.stamping-fairies.de/stempelzubehoer/stempelkissen/distress-ink/-15583.htmlhttps://www.stamping-fairies.de/werkzeuge-nuetzliches/die-namics/-19749.htmlhttps://www.stamping-fairies.de/werkzeuge-nuetzliches/die-namics/-16452.htmlhttps://www.stamping-fairies.de/stempelzubehoer/stempelkissen/distress-ink/-15915.htmlhttps://www.stamping-fairies.de/werkzeuge-nuetzliches/die-namics/-15945.htmlhttps://www.stamping-fairies.de/montierte-stempel/mft/-19730.htmlhttps://www.stamping-fairies.de/montierte-stempel/mft/-19738.htmlhttps://www.stamping-fairies.de/werkzeuge-nuetzliches/die-namics/-19288.html

Ein Herbstkranz für Kulricke

$
0
0

Hallo Ihr Lieben!
Heute habe ich ein Minikärtchen zum Thema Herbst, das ich auf dem Kulricke-Blog zeige. Eigentlich nutze ich ja eher selten die klassischen Herbstfarben zusammen. Aber hier musste es einfach sein.

Hello everyone!
Today I have this mini card with a fall theme, that I am sharing over at the Kulricke Blog today. I barely use those traditional fall colors together, but here I just had to.

Basis der Karte ist grau-brauner Cardstock, auf den ich etwas Holzstruktur aufgestempelt habe.

Base of my card is this grey-ish brown cardstock on which I've stamped some wooden pattern.


Mittig aus der Karte habe ich den Blätterkreis ausgestanzt und mit gründem Cardstock hinterlegt. Dann habe ich ihn noch einmal jeweils aus gelbem und rotbraunem cardstock ausgestanzt und die einzelnen Blätter auf den Kranz in der Karte aufgeklebt. So bekommt er mehr Tiefe und auch mehr Farbe.

I've cut the Blätterkreis from the middle of the card and put some green cardstock behind it. Then I've cut the wreath two times again, once from yellow and once from a reddish brown cardstock and put the single leaves between the die cut leaves on the card base. This adds more depth and more color to my card.


Natürlich durfte auch etwas Text und Deko nicht fehlen.
Ich habe das Herz der Movers and Shapers aus dunkelbraunem Cardstock ausgestanzt, darauf kam der Herbst-Text, gestanzt aus orangefarbenem Cardstock. Unter das Herz habe ich feinen goldenen Faden gesetzt, dazu kam dann eine Schleife aus Twine, ein kleiner Tannenzapfen und eine rote Beere. Ganz zum Schluss habe ich dann noch ein paar metallische Glitzerpunkte in gold und kupfer auf der Karte verteilt.

Of course I neede some decorations as well.
I've die cut the heart from the Movers and Shapers die set from dark brown cardstock and put the die cut word "autumn", cut from orange cardstock, on top of it. Underneath the heart I've put some fine golden string, on top I've added a bow from twine, a mini pinecone and an orange berry. At the end I also added some gold and copper metallic dots onto my card.


https://www.kulricke.de/product_info.php?info=p451_herbst-stanze.htmlhttps://www.kulricke.de/images/product_images/popup_images/moversushapers1.jpghttps://www.kulricke.de/product_info.php?info=p325_blaetterkreis.html

Ein Halloween-Treat für Stamping-Fairies

$
0
0

Hallo Ihr Lieben!
Auf dem Stamping-Fairies Blog zeige ich heute eine Kleinigkeit, die ideal zum Verteilen an Halloween geeignet ist. Und sie war auch schnell gemacht.

Hello everyone!
Over at the Stamping-Fairies Blog I am sharing a little treat today that you could hand out to your trick or treaters on Halloween. And it's fast to make.

Basis ist das Castle Stanzenset. Ich habe den Turm zweimal ausgestanzt und die Zinnen jeweils aus dunklerem Cardstock ebenfalls zweimal. Die habe ich dann ein wenig schattiert und auf dem Turm ein Mauermuster aufgestempelt.
Zwischen die beiden Türme  habe ich eine 1 cm hoch Box mit einem ausgestanzten Kreis eingesetzt. So steht der Turm und die Süßigkeit - wie man wohl schon erkennen kann ein Mini-Lutscher - fällt nicht seitlich heraus.

Base is the Castle die set. I've die cut the tower twice and then the merlon again twice but from a darker shade of grey cardstock. I also added some shading here and then stamped a brick background onto towers.
Between those two towers I've put a box of 1 cm heigth and with a circle die cut from its middle. Now the tower can stand and the treat - I guess you can already tell that it is a mini sucker - can't fall out on the sides.


Hinter den hinteren Turm habe ich einen Vollmond geklebt, an die Rückseite des vorderen Turms ein Fähnchen mit Fledermaus.
Unter die Zinnen auf den Turm habe ich das Spinnennetz aus dem Fab-Boo-Lous Friends Stempelset mit weißem Embossingpulver embosst und etwas weiter unten die süße Spinne aufgeklebt. Den Faden habe ich mit einem weißen Gelmarker aufgemalt.
Hinter das Fenster habe ich orangefarbenen Cardstock gesestzt und außerdem mit einem schwarzen Fineliner ein paar Risse ins Mauerwerk gemalt. Die obere Seite der Zinnen habe ich mit gelbem Kreidepuder etwas eingefärbt, so dass es so aussieht, als ob das Mondlicht darauffällt.

Behind the back tower I've glued a full moon, to the back of the front tower I've glued a banner with a bat.
Under the merlon I've stamped the spiderweb from the Fab-Boo-Lous Friends stamp set, heat embossing it in white, and then glued the spider a little down the tower. The thread the spider is dangling down from was handdrewn with a white gelly marker.
Behind the windows I've put some orange paper and I also added a few cracks to the walls using a black fineliner. The top of the merlon was covered with some yellow chalk so it looks like the moonlight is shinin on them.


Unten an den Turm habe ich einen Halloween-Kürbis gesestzt. Und damit es etwas plastischer wirkt, habe ich darunter/dahinter einen der Oval Shadows, ausgestanzt aus schwarzem Cardstock, gesetzt.

To the bottom of the tower I've glued this cute Jack-O-Lantern. And to make it look a litte more plastic I've put one of the Oval Shadows behind/underneath it.


Und hier könnt Ihr noch sehen, wie der Mini-Lutscher in der Verpackung sitzt und auch die eingeklebte Box ist hier zu erkennen.

And here you can see how the mini sucker is sitting on the box I added as a bottom.


https://www.stamping-fairies.de/werkzeuge-nuetzliches/die-namics/die-namics-oval-shadows.htmlhttps://www.stamping-fairies.de/montierte-stempel/mft/mft-fab-boo-lous-friends.htmlhttps://www.stamping-fairies.de/werkzeuge-nuetzliches/die-namics/die-namics-castle.htmlhttps://www.stamping-fairies.de/stempelzubehoer/embossingpulver/ranger/ranger-embossing-pulver-white-super-fine-detail.html

Stempeleimaleins - Ausgabe vom 14. Oktober 2017

$
0
0

Hallo Ihr Lieben!
In der heutigen Ausgabe des Stempeleinmaleins zeigen wir Euch eine Faltkarte. Die ist schnell zu machen und wirkt trotzdem besonders.

Hello everyone!
With today's issue of Stempeleinmaleins we are sharing a tutorial for this folded card. It's easy to make and still doesn't look ordinary.


So sieht die Kart geschlossen aus. Okay, normalerweise ist sie dann noch etwas schmäler, aber sie wollte nicht komplett flach liegenbleiben fürs Foto. ;)

This is what the closed card looked. Okay, it would be a little less wide but it just didn't want to lie flat for the picture. ;)


Und das ist die geöffnete Karte. Sie steht selbständig und durch die zurückversetzten Seiten kann man prima Szenen gestalten.
Ich habe hier auf den vorderen Streifen dieses süße Motiv von LotV gesetzt. Daran konnte ich im letzten Release nicht vorbei...
Darüber fliegt der Weihnachtsmann von Kulricke und ein paar Wolken habe ich hier auch angebracht.
Die Seitenteile sind spiegelverkehrt gearbeitet - mit Tannenbäumen im Schnee und kleinen Sternen, die vom Himmel hängen.
Um das Motiv habe ich noch eine Schleife aus silber-weißem Garn gebunden.

And this is the opened card. It stands by itself and with the sides backed up a little it is a great card for scenes.
I went with this cute image by LotV on the middle part. I couldn't resist this image during their last release...
Santa is flying across the sky where also a few clouds are hanging.
The sides are mirrored and decorated with trees in the snow and a few small stars hanging from the sky.
I also tied a bow from silver and white twine around the image.


https://www.kulricke.de/de/product_info.php?info=p393_wolken-stanzen.htmlhttps://www.kulricke.de/de/product_info.php?info=p494_sternfunken.htmlhttps://www.kulricke.de/de/product_info.php?info=p322_weihnachtsmann-mit-schlitten.html

Capture the moment für Noor!Design UK

$
0
0

Hallo Ihr Lieben!
Heute zeige ich auf dem Noor!Design UK Blog wieder eine Karte - diesmal in türkis mit einem Touch blau.

Hello everyone!
Today I am sharing another creation over at the Noor!Design UK Blog - using turquoise and a hint of blue.

Für meine Karte habe ich Papier in verschiedenen Blau- und Türkistönen von verschiedenen Herstellern verwendet. Besonders mag ich hier doppelseitiges Papier, denn die Vorder- und Rückseiten passen meist perfekt zusammen. So wie hier das Papier Streetwear von Maja Design. Das ist das schöne Papier mit den Sternchen und auf der Rückseite ist das leicht gemusterte türkisfarbene Papier. 

For my card I went with designer's papers by different manufacturers in different shades of turquoise and blue. I especially like the doublesided papers here since front and back go great together most of the times. Like the Streetwear paper by Maja Design in this case. It's the beautiful paper with the stars on one side and the lighter turquoise one with the light pattern on the other side.


Das Motiv ist die süße Tilda with Daisy Umbrella. Man mag ja im ersten Moment an Sommer denken, aber ich finde, die geht im Herbst auch noch.

The image is this cute Tilda with Daisy Umbrella. You might think of summer first when looking at her but I think she is also great for fall.


Das hier sind all die Dekorationen, die ich angebracht habe. Neben verschiedenen Blumen kam auch etwas Kordel und die Rosen-Stanze von Magnolia zum Einsatz.

These are all the decorations I've put on my card. Beside different flowers I also added some wax cord and two roses, made using the rose die by Magnolia.


Und statt eines gestempelten Textes habe ich dieses gelaserte Chipboard verwendet. 

And instead of a stamped image I went with this laser cut chipboard saying.


https://www.crafteezee.co.uk/ourshop/prod_5625913-Magnolia-RC17-Rose-and-Heart.htmlhttps://www.crafteezee.co.uk/ourshop/prod_5031566-Scrapiniec-Capture-the-MOMENT.htmlhttps://www.crafteezee.co.uk/ourshop/prod_6106399-Maja-Design-DAF-Streetwear.htmlhttps://www.crafteezee.co.uk/ourshop/prod_6118824-The-Peony-Avenue-12x12-Paper-Pack.htmlhttps://www.crafteezee.co.uk/ourshop/prod_4017428-0710Noors-Favourites-Paper-Pad.htmlhttps://www.crafteezee.co.uk/ourshop/prod_3839428-0704Baby-Paper-Pad.htmlhttps://www.crafteezee.co.uk/ourshop/prod_5173607-Wax-Cord.htmlhttps://www.crafteezee.co.uk/ourshop/prod_6168640-0930Blue-Flower-Border-Die.htmlhttps://www.crafteezee.co.uk/ourshop/prod_6136350-Magnolia-YIYB-Tilda-with-Daisy-Umbrella.htmlhttps://www.crafteezee.co.uk/ourshop/prod_6064366-Cherry-Blossom-WHITE.htmlhttps://www.crafteezee.co.uk/ourshop/prod_6067666-Meadow-Spray-White.html

Oktober-Challenge bei AltairArt

$
0
0

Hallo Ihr Lieben!
Heute startet auf dem AltairArt Blog die neue Challenge und wir haben diesmal ein Mood-Board für Euch. Und ja, es ist, passend zur Jahreszeit, ein Herbst-Moodboard. Ich habe mich von den Farben inspirieren lassen - davon bietet der Herbst ja jede Menge!

Hello everyone!
Today we are starting our new challenge over at the AltairArt Blog and this month we have a mood board for you. And yes, matching the time of the year, it is a fall mood board. I got inspired by the colors - fall has plenty of them!

Ich habe ganz viele verschiedene Papiere verwendet - Braun-, Orange- und Rottöne, kombiniert mit etwas blau. Und das Papier mit der Holzoptik passt einfach perfekt.
Auch ein passender Text musste her - hier der Herbst DieCut von Kulricke. Mit weißem Gelstift habe ich ein paar Highlights aufgemalt.

I used a lot of different papers in browns, orange and reds, combined with some blue. And the paper with the wooden print just goes perfectly with a fall theme.
I also needed a matching saying - and simply added a die cut word saying "fall". I've added a few highlights with a white Sharpie.


Auch das Motiv ist natürlich herbstlich. Ich habe dafür einen Stempel von Belles'n'Whistles verwendet. Den kleinen Zauberer, der der Vogelscheuche ein Bonbon reicht, habe ich einfach nicht mit abgestempelt. Coloriert habe ich wie immer mit Copics.

Of course also the image had to be fall-ish. So I used this stamps by Belles'n'Whistles. The little magician that is holding out a treat to the scarecrow was left out here. As usual I did the coloring with Copics.


Auf diesem Bild könnt Ihr einige der Papiere besser erkennen. Zuerst hatte ich die Befürchtung, dass alles zu unruhig werden könnte. Aber das Blau hat alles etwas runtergeholt.
Oben am Motiv habe ich noch einen Gitterkreis sowie zwei Pflanzen angebracht.

On this picture you get a better look at some of the papers. I was afraid that everything would look too messy with all the different colors and patterns but the blue really toned it down.
To the top of the image I've added this circle and two plants.


Und das ist die Deko unten am Motiv. Hier kamen ebenfalls verschiedene Pflanzen, zwei Blüten, eine Beere und die kleinen roten Perlen zum Einsatz.

And this is the decoration at the other side of the image. Here I used different die cut plants again, two flowers, a berry and those red "pearls".


https://www.skarbnicapomyslow.pl/pl/p/AltairArt-Signs-of-love-bloczek-15x15-cm-/8319https://www.skarbnicapomyslow.pl/pl/p/AltairArt-Sunrise-02-szary/6535https://www.skarbnicapomyslow.pl/pl/p/AltairArt-Holy-Mountains-0102-Floor-motywy-goralskie/3923https://www.skarbnicapomyslow.pl/pl/p/AltairArt-Holy-Mountains-0304-The-Old-Cottage-motywy-goralskie/3924https://www.skarbnicapomyslow.pl/pl/p/Ever-and-always-Blue/5603https://www.kulricke.de/de/product_info.php?info=p451_herbst-stanze.html

2 Verpackungen für Kulricke

$
0
0

Hallo Ihr Lieben!
Der ein oder andere hat sie evtl. schon auf der Messe gesehen, aber ich möchte Euch meine beiden TiTa Verpackungen natürlich auch hier zeigen! Gemacht sind sie mit den neuen Stanzen von Kulricke.

Hello eveyone!
Those were already displayed on a few fairs but of course I want to share them here as well - my two boxes that hold a box of mints, made using the new dies by Kulricke.


Das ist die erste der Verpackungen, die aus zwei Teilen besteht und wie ein Buch zu öffnen ist.
Dekoriert habe ich sie mit dem süßen neuen Vampir-Felix, der natürlich perfekt zu Halloween passt. Die Schachtel hat ungefähr die Maße einer Pfefferminz-Dragee-Box - und somit passte an Deko nur ein Mond (gemacht mit zwei Kreisstanzen) und der Halloween-Schriftzug drauf. Den Hut vom Schriftzug habe ich einfach weggeschnitten, der stand so komisch über. Der Text ist aus orangenem Cardstock gestanzt und dann von unten mit schwarzer Tinte gewischt, was den mehrfarbigen Look kreiert.

This is the first of those boxes that is made from two parts from the die set. It can be opened like a book.
It's decorated with the cute new Vampire Felix that is perfect for Halloween.
The box ist quite small so there was only room for a moon - made from two circle dies - and the Halloween text. I just cut off the hat from the text because it looked kind of weird on my box. The text is die cut from orange cardstock and then I used black ink to create the two-color effect.


Und das ist die zweite Verpackung:
And this is the second box:


Auch dafür ist die Stanze im Set enthalten. Sie wird zweimal ausgestanzt und aufeinander gesetzt. Zum Schließen habe ich oben das kleine Euroloch ausgestanzt und ein Band durchgezogen.
Diesmal ist Felix mit Kostüm auf die Box gehüpft. Den handgeschriebenen Text habe ich auf das Schild geschrieben. Das Schild ist aus schwarzem Cardstock gestanzt und mit braunem und rotem Cardstock hinterlegt. Über die beiden O habe ich zwei kleine Wackelaugen gesetzt.

There is a die for this box as well in the set. It gets cut twice and then glued together.
To close the box I've die cut the Euroloch die from the top part and then put some twine through it, tieing a bow from it.
This time I used Felix with Kostüm. The text is handwritten onto the Schild. The Schild has been cut from black cardstock and then I've put red and brown cardstock behind it. I also added two goggly eyes to the two Os.


Und wie Ihr sehen könnt, habe ich die Farben meines Werkes an die Farben der Dragees angepasst.

And as you can see I made the colors of my box match the colors of the mints.


https://www.kulricke.de/de/product_info.php?info=p187_euroloch.htmlhttps://www.kulricke.de/de/product_info.php?info=p647_felix-mit-kostuem.htmlhttps://www.kulricke.de/de/product_info.php?info=p646_felix-vampire.htmlhttps://www.kulricke.de/de/product_info.php?info=p315_halloween.html

Geisterpost für Stamping-Fairies

$
0
0

Hallo Ihr Lieben!
Postboten haben es ja manchmal  nicht einfach - bellende oder sogar beißende Hunde, viele Treppen und heute schauen sogar Geister aus dem Briefkasten! Naja, zumindest auf dieser Karte, die ich heute auf dem Stamping-Fairies Blog zeige. Aber der Geist sieht freundlich aus.

Hello everyone!
Those mail men don't have an easy life - barking or biting dogs, lots of stairs and today there's even a ghost coming out of the mailbox! Okay, at least on this card, that I am sharing over at the Stamping-Fairies Blog today. But the ghost looks pretty friendly.

Ich habe mit einem Stempel ähnlich dem Small Brick Background eine Wand für meine Karte gemacht. Dazu habe ich den Stempel auf weißes Papier gestempelt und weiß embosst. Dann habe ich das Papier mit Distress Ink Weathered Wood gewischt. 
Oben auf der Karte habe ich einen Gruß sowie eines der Party Banners von MFT aufgeklebt.
Für die Tür habe ich den Wood Plank Stempel mit brauner Tinte auf braunen Cardstock gestempelt und passend zugeschnitten. 

I used a stamp similar to the Small Brick Background for the wall. Therefor I stamped it on white paper and heat embossed it using white embossing powder. Then I used Distress Ink Weathered Wood to color the paper in.
On top of the wall I added a greeting and one of the Party Banners by MFT. 
For the door I stamped the Wood Plank stamp with brown ink onto brown cardstock and cut it the size I needed it.


In die Tür oben habe ich ein Fenster eingebaut. Ich wollte aber, dass es alt aussieht, wie es sich für ein Spukhaus gehört. Darum habe ich die Fledermaus aus dem Fa-Boo-Lous Friends Stempelset abgestempelt, coloriert - inklusive des Hintergrunds - und dann alles zweimal mit Ultra Thick Embossing Pulver überzogen. Nach ein paar Minuten im Tiefkühler konnte ich es dann brechen, so dass die Scheibe gesprungen aussieht. Anschließend habe ich noch etwas weiße Farbe darübergewischt, um sie milchiger oder auch dreckiger erscheinen zu lassen. Oben in der Ecke hat dann ein Spinnennetz samt Spinne und eine kleine Fledermaus auf der anderen Seite Platz gefunden.

I added a window to my door. I wanted it to look old, like it's meant to be in a spooky house. So I stamped and colored the bat from the Fa-Boo-Lous Friends stamps set in - including the brown background - and then added two layers of Ultra Thick embossing powder. After a few minutes in the freezer I was able to break the UTEE and make the window look broken. Then I also whiped some white paint over the window to make it look dirty. 
In the top edge a little spider built her web and is dangling down from it and there's a bat on the other side of the window.


Und das ist der Briefschlitz, gemacht mit der Mail Delivery Stanze. Die kann man bestimmt auch super interaktiv einsetzen - bei mir ist es erstmal nur ein normaler Briefschlitz. Er ist aus grauem Cardstock gestanzt und ich habe mit Copics einige Rostflecken daraufgemalt. Auch das L hat sich schon ein wenig gelöst...
Aus dem Briefkasten schauen neben zwei Briefen, die wie das Gras aus dem Mailbox Stanzenset sind, noch der kleine freundliche Geist.

And this is the mailbox, made using the Mail Deliver dies. I guess those are great for interactive cards as well, but here it's just a plain mailbox. It's cut from grey carstock and I used my Copics to add some rust to it. Also the L isn't straight anymore...
Besides two letters, that are from the Mailbox die set as is also the grass, the little friendly ghost is peeking out.


https://www.stamping-fairies.de/stempelzubehoer/embossingpulver/ranger/-14944.htmlhttps://www.stamping-fairies.de/werkzeuge-nuetzliches/die-namics/-18858.htmlhttps://www.stamping-fairies.de/montierte-stempel/mft/-12865.htmlhttps://www.stamping-fairies.de/werkzeuge-nuetzliches/die-namics/-19741.htmlhttps://www.stamping-fairies.de/montierte-stempel/mft/-19738.htmlhttps://www.stamping-fairies.de/werkzeuge-nuetzliches/die-namics/-19749.htmlhttps://www.stamping-fairies.de/montierte-stempel/mft/-15037.htmlhttps://www.stamping-fairies.de/stempelzubehoer/embossingpulver/ranger/-13143.htmlhttps://www.stamping-fairies.de/stempelzubehoer/stempelkissen/distress-ink/distress-ink-weathered-wood.htmlhttps://www.stamping-fairies.de/werkzeuge-nuetzliches/die-namics/-18625.html

Eine Halloween-Karte für Vildastamps

$
0
0

Hallo Ihr Lieben!
Heute zeige ich auf dem Vildastamps-Blog diese kleine Halloweenkarte. Sie ist 12 x 12 cm groß.

Hello everyone!
Today I am sharing this Halloween card over at the Vildastamps Blog. The card is 12 x 12 cm.

Ich habe ein Quadrat aus orangefarbenem Cardstock als Basis gewählt und zwei der Ecken mit Stempeln aus dem Splats Kit bestempelt. Die sieht man nur leicht, denn ich habe sie mit goldenem Embossingpulver embosst - und ich wollte keinen zu unruhigen Hintergrund, denn die vielen Lagen auf der kleinen Karte sind genug.
Darauf kam dann etwas Wellpappe und mehrere Lagen Cardstock.

I used a square from orange cardstock as the base and used stamps from the Splats Kit on two of the corners. Those can barely be seen because I used golden embossing powder to heat emboss those. I opted for a quiet background since those many layers on the small card are enough.
Then I added some corugated cardstock on top of that.


Auf die Wellpappe kam orangefarbener Cardstock, etwas dunkler als der Hintergrund, sowie zwei 10-Ecke und ein Streifen aus gelbem Cardstock.
Die süße Eule ist, ebenso wie der Text und die Blätter, aus dem Halloween 2014 Stempelset. Die Blätter fand ich eine gute Deko, da sie nach Herbst aussehen und durch die Größe gut auf der Karte zu verteilen sind.
Die Eule ist mit Copics coloriert. Ich denke, ich habe aus Versehen die Füße braun mit eingefärbt, aber das fiel mir erst beim Zusammensetzen der Karte auf. Da meine Eule aber eh schwebt, stört  mich das nicht weiter.

Onto the corugated paper I added some orange cardstock, a little darker than the one used in the background, and two decagons and a strip from yellow cardstock.
The cute owl - and the saying and the leaves  as well - is from the Halloween 2014 stamp set. I liked the leaves since they add a fall-ish touch and with their size are easy to be put on different parts of the card.
The owl has been colored in with Copics. I think I inked up the feet in brown as well but only realized that after I had put my card together. But since there is nothing for her to sit on it doesn't bother me.


http://shop.textalk.se/en/article.php?id=16232&art=12073551http://shop.textalk.se/en/article.php?id=16232&art=24344981

Stempeleinmaleins - Ausgabe vom 21. Oktober 2017

$
0
0

Hallo Ihr Lieben!
Beim Stempeleinmaleins wird es diese Woche Halloween-ig. Wir haben eine Anleitung für eine Sargbox für Euch.

Hello everyone!
Over at Stempeleinmaleins we are going Halloween today. We have made a tutorial for a coffin box for your Halloween treats.

Ich habe hier das süße Stempelset Witch Way is the Candy? von MFT verwendet. Zuerst dachte ich ja, das brauche ich nicht. Aber naja, wie es halt so ist... Und es ist so süß!
Ich habe auf dem Deckel des Sarges eine Szene mit Frosch, Hexe, Kürbis und Zaun gestaltet. Oben am Himmel steht der Mond und eine Wolke ist am Himmel zu sehen - und über allem schwebt die süße Fledermaus.
Das Boo ist aus dem Stempelset Fab-Boo-Lous Friends - es ist nur ein Teil eines Worts, aber so passte es auf mein kleines Schild.
Die Sterne habe ich mit einem weißen Gelmarker aufgemalt.

I used the cute Witch Way is the Candy? stamp set by MFT here. First I though I wouldn't need it, but you crafters know and understand... It's just so darn cute!
On the lid of my box I created a scene with frog, witch, pumpkin and fence. The moon is shining, only one cloud is in the sky and the cute bat is flying over all.
The Boo is from the Fab-Boo-Lous Friends stamp set - it's only  a part of a saying but only this part fitted on my small sign.
The stars are made using a white gelly marker.


Die Ränder des Unterteils der Box habe ich mit weißer Tinte gewischt.
Um den Deckel habe ich erst schwarze Spitze und dann grünes Band gewickelt und daran dann einen Spinnennetz-Charm festgebunden.

The edges of the box itself were inked with white ink.
Around the lid I wrapped some black lace first and then some green ribbon, to which I've tied a cobweb charm.


Eine Halloweenbox für Noor!Design UK

$
0
0

Hallo Ihr Lieben!
Heute zeige ich wieder etwas auf dem Noor!Design UK Blog. Und ja, ich habe mal wieder das Thema Halloween aufgegriffen. Und ich möchte Euch zeigen, dass Ihr dafür nicht unbedingt spezielle Halloween-Dies oder -Stempel braucht.

Hello everyone!
Today I am sharing another creation over at the Noor!Design UK Blog. And yes, it's Halloween related. I also want to show you that you don't have to have any dies or stamps made especially for Halloween to make a Halloween craft.

Ich habe eine Mini-Popcornbox gemacht. Sie ist aus grauem Cardstock und ich habe ein Designpapier mit Mauerdruck in grau-weiß daraufgeklebt.
Gefüllt ist die Box mit diesen geschredderten Papierstreifen und einem Cellophanbeutel  voll mit Süßem. Um die Tüte zu verschließen, habe ich grün-weißes Twine drumgewickelt und eine kleines Stück Spitze mit in die Schleife gebunden.

I made a mini popcorn box. It's cut from grey cardstock and I've put some designer's paper with a wall print in white and grey on it.
The box is filled with those shredded papers and a clear treat bag filled with candies. To close the bag I've tied some green and white twine around it and added a piece of lace here.


Der süße Singing Napoleon von Magnolia sieht mit seiner Mütze doch aus wie ein Zauberer, oder? Und außerdem hat er sich ein grünes Lätzchen umgebunden.
Dahinter habe ich einen weißen Holzzaun gesetzt, den ich etwas schwarz eingefärbt und durch den ich eine Efeuranke habe wachsen lassen. Die Efeuranke ist aus grünem Foamiran gestanzt. Ich komme damit ehrlich gesagt nicht ganz klar, darum muss es für kleinere Deko herhalten. Aber mit einem Embossingföhn angewärmt, biegt es sich ganz leicht, was der Ranke einen tollen Look gibt.

The cute Singing Napoleon looks like a magician, right? He also put on a green bib. 
I've put a white wooden fence behind him that I put some black ink on and wrapped some ivy through it. The ivy is cut from green Foamiran. Honestly, I can't figure out how to use it, no matter how many videos I watch. So I am using it to cut decorations from it. And if you heat it up with an embossing tool the edges bend which adds a nice look.


Das Boo ist aus lilafarbenem Foamiran gestanzt. Und für den Mond aus gelbem Cardstock habe ich einfach zwei Kreisstanzer verwendet.

The Boo is cut from purple Foamiran and for the moon from yellow carstock I simply used two circle punches.


https://www.crafteezee.co.uk/ourshop/prod_5429083-AH16-Singing-Napoleon.htmlhttps://www.crafteezee.co.uk/ourshop/prod_6074744-Foamiran-Indigo.htmlhttps://www.crafteezee.co.uk/ourshop/prod_5649436-Foamiran-Olive-Green.htmlhttps://www.crafteezee.co.uk/ourshop/prod_5844544-White-Wooden-Fence-2pcs.htmlhttps://www.crafteezee.co.uk/ourshop/prod_4017346-0457Autumn-Ivy-Wreath-Circle-Die.htmlhttps://www.crafteezee.co.uk/ourshop/prod_6118824-The-Peony-Avenue-12x12-Paper-Pack.htmlhttps://www.crafteezee.co.uk/ourshop/prod_6123746-Lace-Rebecca.html

Clean und simple für Stamping-Fairies

$
0
0

Hallo Ihr Lieben!
Heute zeige ich auf dem Stamping-Fairies Blog diese Herbstkarte. Ich hatte sie für die "CAS" Kategorie der Design Superstar Challenge bei MFT gemacht. 
CAS ist für mich ja immer die größte Herausforderung. Und auch bei dieser Karte musste ich mir mehrfach sagen "stop, das reicht!".

Hello everyone!
Over at the Stamping-Fairies Blog I am sharing this fall card today. I made it for the CAS category of the Design Superstar Challenge over at MFT.
CAS is always the hardest for me. And also while making this card I had to tell myself several times "stop, that's enough".


Und hier habe ich ein Foto des dekorierten Teils meiner Karte.
Ich habe mir aus einem Stück Kopierpapier ein Rechteck in der Größe ausgeschnitten, das mein Hintergrund haben sollte und dann das Negativ auf die Karte gelegt. So konnte ich innerhalb des Rechtecks wischen.
Für das Gras habe ich einen der Stitched Snow Drifts ebenfalls aus Kopierpapier gestanzt und als Schablone verwendet. Dann habe ich das Gras mit Distress Ink Peeled Paint und Mowed Lawn gewischt. Im Anschluss habe ich mit Distress Ink Weathered Wood und der Mini Cloud Edge Schablone die Wolken gewischt.
Dann habe ich den Baum aus dem Modern Trees Stempelset gestempelt. Auf die Blätter habe ich verschiedenfarbige Tinte aufgetragen und die Blätter mehrfach gestempelt. So entsteht der Look der mehrfarbigen Blätter.
Über die Szene kam dann der Rectangle Shaker Window and Frame - nur der äußere Rahmen -, den ich beim Stanzen etwas verängert habe, so dass genug Platz für Baum, Hintergrund, Bär und Text war.
Der Text aus dem Forest Friends Stempelset ist weiß auf dunkelbraunen Carstock embosst und mit der Hand zu einem Fähnchen zugeschnitten. Dieses Fähnchen kam dann quer über die Karte, so dass oben und unten etwas Gras zu sehen ist.
Ganz zum Schluss kam dann noch der süße Bär aus dem Bitty Bears Stempelset. Er ist mit Copics coloriert und auf dem Regenschirm habe ich dann noch mit einem Gelmarker ein paar kleine weiße Punkte aufgemalt.
Und da ich doch nicht ganz ohne Deko kann, haben zumindest noch 4 Gloss-Punkte, gemacht mit  Enamel Accents Lemon Twist, Platz auf der Karte gefunden.

And here is a close-up of the decorated part of my card.
I've cut a rectangle from a sheet of copy paper, making it the size I wanted my background to be. Then I used the paper with the cutout as a stencil to be able to create the background within the rectangle.
For the grass I've die cut one of the Stitched Snow Drift edges from copy paper and used as a stencil as well. Then I used Distress Ink Mowed Lawn and Peeled Paint to bring the grass onto my card. For the clouds I used the Mini Cloud Edge stencil and Distress Ink Weathered Wood.
Next I've added the tree from the Modern Trees stamp set to my scene. I used different inks for the leaves, only inking up parts of the stamp each time. That is how those multi-colored leaves were made.
On top of the scene I've put the frame from the Rectangle Shaker Window and Frame die set that I made a little longer while cutting it out. That left enough room for the tree, the background, the bear and the saying.
The saying is from the Forest Friends stamp set and heat embossed with white embossing powder onto dark brown cardstock. Then I handcut the cardstock with the sentiment to create the little banner. The banner was then added across my card, leaving a bit of grass visible over and under the banner.
At the end I've added this cute bear from the Bitty Bears stamp set. He's colored in with Copics and I added a few white dots to the umbrella with a white gelly marker.
And since I can't go completly without embellishments I added at least four yellow glossy dots, made using Enamel Accents Lemon Twist.


https://www.stamping-fairies.de/werkzeuge-nuetzliches/die-namics/-14203.htmlhttps://www.stamping-fairies.de/-18525.htmlhttps://www.stamping-fairies.de/montierte-stempel/mft/-19870.htmlhttps://www.stamping-fairies.de/montierte-stempel/mft/-17608.htmlhttps://www.stamping-fairies.de/werkzeuge-nuetzliches/die-namics/-19744.htmlhttps://www.stamping-fairies.de/werkzeuge-nuetzliches/schablonen-stencils/mft-stencils/-19616.htmlhttps://www.stamping-fairies.de/montierte-stempel/mft/-19871.htmlhttps://www.stamping-fairies.de/stempelzubehoer/stempelkissen/distress-ink/distress-ink-weathered-wood.htmlhttps://www.stamping-fairies.de/stempelzubehoer/stempelkissen/distress-ink/distress-ink-mowed-lawn.htmlhttps://www.stamping-fairies.de/stempelzubehoer/stempelkissen/distress-ink/distress-ink-peeled-paint.html

Meine zweite Karte im Oktober für Vildastamps

$
0
0

Hallo Ihr Lieben!
Huch, da habe ich doch glatt vergessen, Euch meine zweite Karte für den Vildastamps Blog diesen Monat zu zeigen! Das wird hiermit nachgeholt - bevor Halloween vorbei ist. Denn auch meine zweite Karte hat das  Thema Halloween.

Hello everyone!
Oops, somehow my post about my second card for october for the Vildastamps Blog went missing! So I am posting it now - before Halloween is over. Because also my second card has a Halloween theme.

Diese Karte ist einfach, ich wollte den Fokus auf dem Motiv haben. Es ist eine weiße Grundkarte mit einem schmalen Rand orange-schwarzem Designpapier, darauf schwarzer Cardstock und darauf dann der Kraftcardstock mit dem Motiv. 
Oben kam der Halloween-Text auf den Cardstock und ich habe mit weißem Gelmarker ein paar Highlights aufgemalt.

This card is pretty simple, I wanted the image be the focus. It's a white card base on which I've put some black and orange designer's paper and then some black carstock on top of that. The next - and last - layer is the craft cardstock with the image.
On the upper area I've stamped the Halloween text and added some white highlights using a gelly marker.


 Und das ist das Motiv "Witch on Pumpkin" -  und das hat aber ewig gedauert. Es ist mein erster Versuch mit Polychromos auf Kraftpapier - bzw. mit Polychromos überhaupt. Ich dachte ja nicht, dass das so lange dauert! Aber mit dem Ergebnis bin ich zufrieden...
Ich habe fleißig Lage über Lage gemalt, damit ich die Farbbrillianz bekomme, die ich wollte und trotzdem mit der Coloration zufrieden war. An den Haaren muss ich definitiv noch üben!
Mit einem weißen Gelmarker habe ich auf den Himmel/Hintergrund ein paar Sterne aufgetupft.
And this is the "Witch on Pumpkin" image - and it took forever! It is my first try with Polychromos on craft paper - and Polychromos in general. I didn't expect the coloring to take that long! But I like the outcome...
I've put layer on layer here to get the colors as brilliant as possible and still am happy with the coloring. I definately have to practice on the hair here!
I used a white gelly marker again to add a few dots on the background meaning them to be stars.


http://www.vildastamps.com/hogtiderholidays/halloween/halsningar-fran-dig-till-mig.htmlhttp://www.vildastamps.com/hogtiderholidays/halloween/pumpasvirl.html

Zwei Werke für den Kulricke Blog

$
0
0

Hallo Ihr Lieben!
Heute zeige ich gleich zwei Werke auf dem Kulricke-Blog. Das eine ist, wie oben schon zu sehen, weihnachtlich, das andere jahreszeitlich eher ab vom Schuss. Aber dazu später mehr. Erstmal zu meiner Pop Up Card in a Box. Die ist mit der Stanze von Kulricke wirlich fix gemacht - und man hat so schön viel Platz für Deko bzw. Szenen.

Hello everyone!
Today I am sharing two projects over at the Kulricke Blog. As you can see, one is christmas related, the other one is a bit more out of season. But more about that later. First I want to share my Pop Up Card/Box. With the die by Kulricke this type of card is really quickly done - and there's plenty of room for decorations and scenes.

Die drei Seitenflügel sowie die Rückseite habe ich mit Designpapier beklebt. Den Rest habe ich weiß gelassen, passt so schön zum Winter.
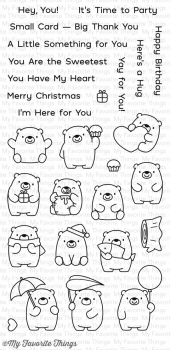
Auf den vorderen Flügel habe ich einen Text aus dem Stempelset Weihnachten Elegant aufgeklebt und eine kleine Schleife aus Baker's Twine mit angebracht.

The three side parts and the back were covered with designer's paper. The rest was left blank, it reminds me of snow.
To the front I've added some christmas wishes and also a bow made from green and white baker's twine.


Ich habe in meine Box 4 "Zwischenlagen" eingebaut, was aber absolute Geschmackssache ist. Alle habe ich mit weißem Cardstock beklebt, der den verschneiten Boden darstellen soll.
Felix und Luke holen schon mal den Weihnachtsbaum aus dem Wald. Ich habe hier den Mini-Stempel verwendet.
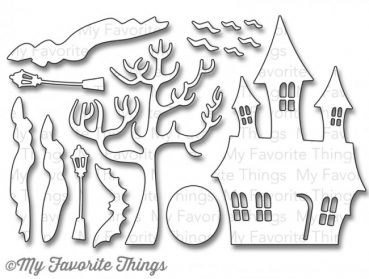
Auf die Lage dahinter habe ich zwei Häuser geklebt. Für die Dächer habe ich die Häuser noch einmal aus rotem Cardstock ausgestanzt und dann die Dächer abgeschnitten und auf die Häuser aus braumen Cardstock aufgeklebt. Die Fenster sind schwarz hinterlegt.
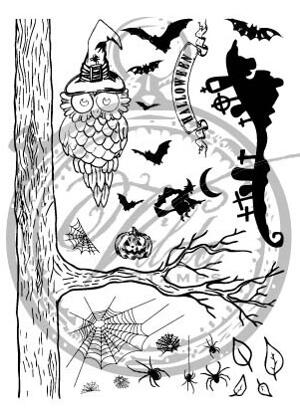
Der Wald dahinter ist mit dem Tannenbaum aus dem Stanzenset Baum und Blatt gemacht. Ich habe die Tannen mit weißer Paste "beschneit" und dann in unterschiedlicher Höhe festgeklebt. Mit der selben Stanze ist auch die Mini-Tanne im Vordergrund gemacht. Dafür habe ich den unteren Teil des Baumes einfach abgeschnitten.
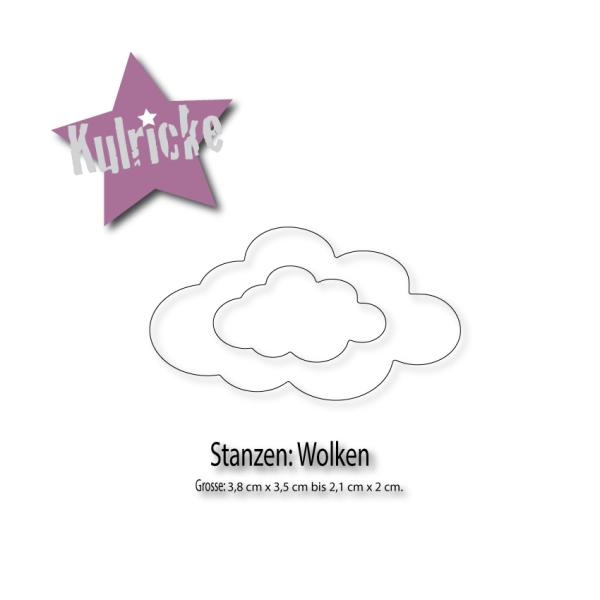
Und auf der Rückseite der Karte habe ich zwei Wolken sowie den Weihnachtsmann mit seinem Schlitten angebracht.

I've added 4 additional layers inside the box, but that's completl up to you. I've glued some wavy borders from white cardstock to each of them to create a snowy ground.
Felix and Luke are bringing in the tree already. I used the mini stamp here.
To the next layer I've added two houses. For the roofs I've die cut the houses again from red cardstock, then cut off the roof and glued them onto the brown houses. I've added some black cardstock behind the windows.
The woods behind the houses are made using the tree from the Baum und Blatt die set. I used some white paste to add some snow to them and then glued them down to my card. I used the same die for the mini tree on the first panel. I've simply cut off the bottom part.
To the back of my card I've added two clouds and Santa with its sleigh.


Hier kann man die Lagen noch besser sehen. Ich habe zusätzlich bei den Häusern und den Bäumen mit 3D Tape gearbeitet, was für noch mehr Tiefe sorgt.

Here you get a closer look at the layers. In addition I also used dimensional tape between the houses and trees to add even more depth.


Zuerst wollte ich die Seitenteile nicht zusätzlich dekoriere, das war mir dann aber doch zu fad. Darum habe ich hier zwei Schneeflocken aufeinander gesetzt und aufgeklebt. Darauf kam jeweils noch ein kleines Sternchen aus Holz und eine Schleife aus Twine.

First I didn't want to decorate the sides but it just looked too plain. So I've die cut two snowflakes, put them on top of each other and glued them to the sides. Then I've added a small wooden star and a bow from twine.

Und nun noch zu meinem anderen Werk:

And now on to my other project:


Es ist schon eine Weile her, dass die Schule wieder angefangen hat. Aber ich habe trotzdem noch einen Schulranzen zu zeigen... Getreu nach dem Motto "lieber spät als nie". Auch den haben einige von Euch evtl. schon auf einer Messe als Muster am Kulricke-Stand gesehen. Da ich nicht denke, er wäre eines eigenen Blogposts würdig, habe ich ihn hier mit angehängt.

It's a while that school has re-started. But I have a school bag box to share... Better late than never, right? Also this one has already been displayed at the Kulricke booth on a few stamp fairs. Since I didn't think it would be good for an extra blog post I just added it to this post instead.


Der Schulranzen war wirklich schnell gemacht - Dank der Cameo-Datei von Flati. Ich habe ihn aus doppelseitigem Cardstock ausgeschnitten und zusammengesetzt.
Als Deko kam dann der süße Felix mit Schultüte zum Einsatz. Oben an die Schultüte habe ich etwas Zwirn gebunden.
Der Text ist aus dem ABC Schule Stempelset.

This school bag was quickly done - thanks to the Cameo cutting file by Flati. I've cut it from doublesided cardstock.
This cute Felix with his Schultüte - a big cone that is filled with useful stuff, toys and candies and that every child gets at his/her very first day of school - is used for decorations. I've tied some twine around the top of the cone.
The saying means first day of school.


Und ich möchte Euch nicht vorenthalten, dass der Schulranzen auch von hinten perfekt und realistsisch aussieht.

And I also want to show you that this school bag looks perfect on its back also.


https://www.kulricke.de/de/product_info.php?info=p658_pop-up-card-box-stanze.htmlhttps://www.kulricke.de/de/product_info.php?info=p444_haeuser-stanzen.htmlhttps://www.kulricke.de/de/product_info.php?info=p491_-baum---blatt-.htmlhttps://www.kulricke.de/de/product_info.php?info=p670_felix---luke-minis-stempel.htmlhttps://www.kulricke.de/de/product_info.php?info=p322_weihnachtsmann-mit-schlitten.htmlhttps://www.kulricke.de/de/product_info.php?info=p393_wolken-stanzen.htmlhttps://www.kulricke.de/de/product_info.php?info=p669_felix-schultuete.htmlhttps://www.kulricke.de/de/product_info.php?info=p641_weihnachten-elegant-set.html

Ein Hexenbesen für Stamping-Fairies

$
0
0

Hallo Ihr Lieben!
Heute zeige ich auf dem Stamping-Fairies Blog noch eine schnelle Halloween-Idee. Sieht süß aus und ist - mit einem einfacheren Tag - wirklich schnell gemacht.

Hello everyone!
Today I am sharing another quick idea for a Halloween gift over at the Stamping-Fairies Blog. I think it looks really cute and - with a simpler tag - it's made in like no time.

Es ist ein mit Süßigkeiten gefüllter Hexenbesen. Dafür habe ich einfach ein Reagenzglas "verkleidet".

It's a broom filled with candies. I simply "dressed up" a test tube for it.


Für den unteren Teill des Besens habe ich schwarzen Cardstock und die Mini Fringe Stanze von MFT verwendet. Der untere Teil ist aus zwei dieser Bordüren gefertigt. Den Anfang habe ich an das Röhrchen geklebt und dann einfach drumherum gewickelt. Damit es realistischer aussieht, habe ich die einzelnen Streifen ein wenig nach außen gebogen.
Der obere Teil ist aus nur einer gestanzten Bordüre, die ich dann so zugeschnitten habe, dass nur knapp 1 cm der Fransen übrig ist. Diese Bordüre habe ich dann bündig mit der längeren und verkehrt herum an das Reagenzglas geklebt. Um die Nahtstelle zu überdecken, habe ich etwas grün-weißes Garn um den Besen gewickelt und zur Schleife gebunden.

For the lower part of the broom I used black cardstock and the Mini Fringe die by MFT. The larger part is made from two of those borders. I simply glued the beginning to the test tube and wrapped the border around it. To make it look more realistic I 've bend the fringes a bit outwards.
The upper part here is made from just one of the fringe borders that I've cut so only about 1 cm of the fringes are left. Then this is glued upside down next to the other longer ones. To cover the area where both borders meet I've wrapped some green and white twine around it an tied a bow from it.


Oben habe ich einen Tag ans Reagenzglas gebunden. Dafür habe ich eines der Tall Tag Duos aus weißem Cardstock gestanzt, ihn dann in der Stanze nach oben geschoben und nochmal gestanzt, so dass das Tag kürzer wurde. War etwas frickelig, die Nähte übereinstimmen zu lassen, aber es hat geklappt.
Dann habe ich hier die süße Katze aus dem Stempelset Witch Way is the Candy aufgestempelt und coloriert, mal wieder ohne sichtbare Linien. Zum Schluss kam noch der Text dazu - auch aus dem Stempelset, allerdings habe ich das "alte", bei dem die Text anders geschrieben sind - und also Deko etwas schwarzer Tüll, mehr Garn und ein Kürbis-Charm.

To the top of my test tube I've added a tag. I used one of the Tall Tag Duos here and cut it from white cardstock. Then I've put it back in into the die and cut it again to make it shorter. It was a bit tricky to get the stitches lined up but it worked.
Then I stamped the cute cat from the Witch Way is the Candy stamp set onto the tag and colored it in, again without visible outlines. In the end I've added a saying - from the same stamp set, but I own the old one where the font is different than in the re-released one - and some black tulle, more twine and a pumpkin charm for decorations.

Wundert Euch nicht über die Füllung - irgendwie hatten alle Süßigkeiten, die in das Reagenzglas gepasst hätten, Beine bekommen, so dass ich aus farbtechnischen Gründen auf grüne Keksdeko zurückgreifen musste... ;)

Don't wonder about what I filled the test tube with. Somehow all the candies that would have fit into it disappeared and so, due to color matching, I had to used green tree-shaped sprinkles... ;)


https://www.stamping-fairies.de/werkzeuge-nuetzliches/die-namics/die-namics-tall-tag-duo.htmlhttps://www.stamping-fairies.de/montierte-stempel/mft/mft-witch-way-is-the-candy.htmlhttps://www.stamping-fairies.de/werkzeuge-nuetzliches/die-namics/die-namics-mini-fringe.html

Stempeleinmaleins - Ausgabe vom 28. Oktober 2017

$
0
0

Hallo Ihr Lieben!
Heute startet die neue Challenge beim Stempeleinmaleins - diesmal wieder mit einem Sketch.

Hello everyone!
Today we are starting our new challenge over at Stempeleinmaleins - and we have a sketch for you to follow this month.

Ich habe diese herbstliche Karte gewerkelt. Das Designpapier hat mich vor eine Herausforderung gestellt, aber ich denke, ich habe es zufriedenstellend hinbekommen.

I made this fall-ish card. The designer's paper was a challenge itself but I think the card turned out okay.


Da im Sketch viel Platz für das Motiv eingeplant ist, habe ich diese Szene gemacht. Dazu habe das Gras gewischt, die Bäume von MFT mehrfarbig abgestempelt und die Blätter auch benutzt, um ein wenig Gebüsch unterhalb der Bäume aufzustempeln.

Since the sketch offers quite some room for the image I created this scene. I used Distress Ink to make the hill/grass, stamped those trees by MFT using several colors and also used the leaves to create the bushes under the trees.


Der süße Fuchs von Kulricke schaut in den Herbstwald. Ich habe ihn mit einer Kombi aus Copics und Polychromos coloriert und dann mit 3D Tape aufgeklebt.

This cute fox by Kulricke is looking into the woods colored by fall. The fox is colored in using a combination of Copics and Polychromos and then glued to the card with dimensional tape.


Oben in der Ecke habe ich einen kleinen Text angebracht. Dazu habe ich die Hälfte der Happy Birthday Frame Stanze von MFT verwendet und in die Mitte ein Herz und ein Blatt mit Schleife gesetzt.
Rechts neben das Motiv habe ich noch ein paar ausgestanzte Zweige geklebt.

In the top right corner I added a saying and used half of the Happy Birthday Frame die by MFT and added a heart, a leave and a bow to the middle.
To the right of the image I also added a few die cut twigs.


Ein Lollipop Flower für Noor!Design UK

$
0
0

Hallo Ihr Lieben!
Auf dem Noor!Design UK Blog zeige ich heute diese Lollipop Flower, ganz im herbstlichen Design.

Hello everyone!
Over at the Noor!Desing UK Blog I am sharing this Lollipop Flower today, decorated all fall-ish.


Grundlage ist eine große Rosette aus braunem Cardstock, darauf kam ein Kreis aus weißem Cardstock. Das Designpapier ist von Maja Design und Studio 75.
Der Pilz ist aus 3 verschiedenen Lagen zusammengesetzt und mit einem Gelmarker habe ich ein paar weiße Punkte auf den Hut gemalt. Am Stil habe ich den weißen Cardstock ein paar Mal eingeschnitten und die kleinen Streifen ein wenig nach oben gerollt.

As a base I used this large paper rosette, made from craft cardstock. Then I added a circle from white cardstock. The designer's paper is by Maja Design and Studio 75.
The mushroom is put together from 3 different layers and I used a white gelly marker to add a few dots to the red cardstock. I made a few slits into the white cardstock and then rolled up the individual strips a bit.


Die Blätter sind aus elfenbeinfarbenem, olivgrünem und dunkelgrünem Foamiran gemacht. Nachdem ich sie ausgestanzt hatte, habe ich verschiedene Grün-, Gelb-, Orange- und Brauntöne verwendet und so den Blättern ein herbstliches Aussehen verliehen. Langsam scheine ich mit dem Zeug zurechtzukommen. Ich weiß ja nicht, wie das bei Euch ist, aber ich habe normalerweise kein Bügeleisen auf dem Basteltisch. Hier habe ich kurzerhand das Glätteisen meiner Mädels benutzt - das Zimmer ist gleich nebenan und das Bügeleisen ein Stockwerk tiefer - und das hat prima funktioniert! Dann habe ich hier noch ein paar Beeren und einen kleinen Tannenzapfen mit aufgeklebt.

The leaves are made using ivory, olive green and dark green Foamiran. After die cutting the leaves I used different shades of green, yellow, orange and brown inks to give them a fall-ish look. Seems like slowly I am getting the grip on that stuff. Usually I don't have an iron on my craft desk so I used one of my daughters straighteners instead - her room is next door while the iron would have been on the 1st floor and my craftroom is on the 2nd - and that worked great for me!
Then I added some berries and a small pinecone here.


In die Rosette habe ich einen Papierstrohhalm geklebt, den ich direkt unterhalb der Rosette auch ein wenig dekoriert habe. Ich habe etwas Spitze drumgebunden - so wie sie wegsteht passt sie prima zum Pilz - und daran einen großen Schleifen-Charm angebunden.

I've put a paper straw into the rosette and also decorated this a bit. I've wrapped some white lace around it - and it kind of looks like the white cardstock on the mushroom - and then added a big bow charm.


https://www.crafteezee.co.uk/ourshop/prod_3582811-0333Cutting-Embossing-Mushroom-Leaf-Die.htmlhttps://www.crafteezee.co.uk/ourshop/prod_6118824-The-Peony-Avenue-12x12-Paper-Pack.htmlhttps://www.crafteezee.co.uk/ourshop/prod_6106414-Maja-Design-DAF-Jeans-and-Tie.htmlhttps://www.crafteezee.co.uk/ourshop/prod_5649436-Foamiran-Olive-Green.htmlhttps://www.crafteezee.co.uk/ourshop/prod_5649470-Foamiran-Dark-Green.htmlhttps://www.crafteezee.co.uk/ourshop/prod_5649442-Foamiran-Ivory.htmlhttps://www.crafteezee.co.uk/ourshop/prod_6030211-Lace-Irene.htmlhttps://www.crafteezee.co.uk/ourshop/prod_6009794-Vintage-Bow.htmlhttps://www.crafteezee.co.uk/ourshop/prod_5530189-Minature-Pine-Cones-15-per-pack.html
Viewing all 2698 articles
Browse latest View live